That old backyard grill has seen better days. It’s been the centerpiece of countless family barbecues, but now it’s rusty, doesn’t heat right, and is taking up prime real estate in your outdoor kitchen area. Removing it feels like the first step to reclaiming your patio space. But before you can enjoy that clean slate, the grill itself has to go. For homeowners in Lake Wales, Winter Haven, and Sebring, a professional grill removal is the safest and easiest solution. But even the pros can work faster and more efficiently with a little help from you. This guide is designed to walk you through the simple preparation steps. By getting your grill ready for us, you ensure a quick, smooth, and affordable removal service, getting you one step closer to your beautiful new outdoor space.
Little Grill Removal Preparation Makes a Big Difference
Grill removal preparation is like clearing the driveway before a big truck arrives to pour a new concrete slab. The truck can do its job, but if the driveway is cluttered with cars and toys, the job gets complicated, slow, and more expensive. A clear driveway lets the work happen smoothly, on time, and on budget. When you take a few moments to prepare your grill area, you do the same thing for our crew. You enhance safety by identifying potential hazards ahead of time. You save us precious minutes on the job, which can help keep the cost of your service down. Most importantly, you ensure the process is seamless, with no surprises, allowing us to leave your property clean and ready for your next project. A small amount of preparation on your end leads to a perfectly executed job on ours.
Understanding this partnership is key, and the best way to help is by following a simple, clear plan.
Your Simple Blueprint for Grill Removal Preparation
Every smooth project starts with a good plan. This section is your straightforward blueprint to preparing for your professional grill removal. We will break it down into easy phases, from the absolute must-dos for safety to the final touches that make our job effortless. You won’t need to be a handyman or own fancy tools. This is about simple, logical steps that any homeowner can handle. Following this plan ensures nothing is forgotten and that our team can arrive and get right to work, providing you with the fast and efficient service you expect.
The very first part of this plan, and the most important, is all about safety.
Step 1: The Safety First Checklist
Before you do anything else, your only job is to make the area safe. This is like turning off the water main before you fix a leaky pipe; it’s the essential first step that prevents a big mess. For a grill removal, this means dealing with the grill’s fuel source. If your grill is natural gas or propane, you must shut off the gas supply. Locate the shut-off valve on the gas line behind or near the grill and turn it to the closed position. For an extra layer of safety, find the main gas shut-off valve for your property and turn it off as well. This is the single most important step to ensure a safe removal process for everyone.
If your grill has an electric ignition or lights, your next move is to cut the power. Find the correct circuit breaker in your home’s electrical panel and switch it off. Finally, give the grill a quick visual check. Remove the propane tank if it’s a portable model, and clear out any grilling tools, utensils, or stored items from the surrounding cabinets. This simple safety check takes just a few minutes but makes the entire process secure. Once safety is confirmed, you can think about what, if anything, you need to disconnect.
Step 2: To Disconnect or Not to Disconnect?
This is a common question we hear. Our answer is simple: for your safety, please do not disconnect the gas or electrical lines yourself. Think of it like this: you would call a professional to handle live electrical wires in your wall; the gas line connected to your grill requires the same expert care. Gas connections can be tricky and dangerous if handled incorrectly. The best and safest practice is to leave the technical disconnections to our trained and insured professionals. This protects you, your family, and your property from any accidental damage.
Your role is one of preparation, not technical work. Your job is to ensure our team has clear and safe access to these connection points. This means removing any items stored inside the grill cabinetry and ensuring the doors to these compartments can open fully. If the grill is free-standing, simply pulling it away from the wall a few inches gives us the room we need to work safely. By leaving the disconnections to us, you guarantee the job is done safely and to code. Your preparation now shifts to clearing the path for a quick and clean removal.
Step 3: Clearing the Path for a Quick Exit
With the safety checks done and the technical work left to us, your final prep task is to create a clear runway. Our crew’s goal is to remove your grill quickly and without damaging your property. You can help immensely by ensuring we have a clear path from the grill to our truck. This is like clearing a path for movers carrying a large couch; it prevents trips, delays, and accidents. Take a walk from your outdoor kitchen to the curb or driveway. Move any patio furniture, potted plants, children’s toys, or garden hoses out of the way.
If the grill is on a wooden deck or has a fragile patio stone surface, you might point this out to our crew lead when we arrive so we can take extra care. Finally, give us a heads-up about any potential obstacles we can’t see, like a narrow gate or a steep hill in the backyard. This information helps us come prepared with the right equipment and manpower. This act of clearing the path is the final step in a perfect preparation plan and allows for a swift and efficient removal.
Why Choosing a Local Junk Removal Pro is the Smartest Move
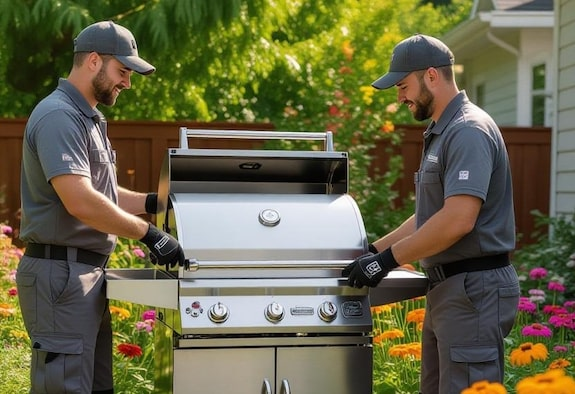
You have the power to remove an old grill yourself, but it is a surprisingly difficult and potentially hazardous task. Grills are heavy, awkward, and often connected to gas lines. Choosing a professional grill removal service in Winter Haven, Sebring, or Lake Wales is the smart, safe, and stress-free choice. Local pros like us bring the right tools, equipment, and manpower to handle the weight and the disconnections safely. We are insured, protecting you from any liability. We also handle the responsible disposal of your old grill, ensuring it is recycled properly whenever possible, which is a major benefit for our Florida environment. Your preparation makes our job faster, and our expertise ensures it is done right.
Ready for a Fresh Start? We’re Here to Help.
You’ve done the smart work by preparing. Now, let us handle the heavy work. If you are in Lake Wales, Winter Haven, Sebring, or any of the surrounding communities and have an old grill that’s overstayed its welcome, our team at Junk-It Near Me is ready to help. We provide fast, safe, and affordable grill removal services. We handle the disconnection, haul-away, and responsible disposal, leaving your outdoor space clean and clear.
Contact us today for your free, no-obligation quote and let’s get that space cleared!
Conclusion
Reclaiming your outdoor living space from an old, unused grill is an exciting project. By taking a few simple steps to prepare for a professional removal, you ensure the process is seamless, safe, and efficient. Then, you can stand back and let the experts handle the heavy lifting, leaving you with a clean slate and the freedom to imagine what’s next for your perfect Florida backyard.
About Junk-It Near Me
For homeowners in Lake Wales, Winter Haven, and Sebring, FL, Junk-It Near Me is the top choice for professional grill removal. We specialize in making the process of removing old, unwanted grills completely hassle-free. Our insured and trained teams handle the entire process, from safe disconnection to responsible disposal, and we focus on recycling whenever possible. As a trusted local junk removal provider serving Polk and Highlands Counties, we are committed to offering reliable, efficient, and affordable service to help you clear your space and reclaim your outdoor living area.