You’ve finally done it. You’ve pored over the paint swatches, saved up for that beautiful quartz countertop, and your dream kitchen renovation is about to begin. You’re buzzing with excitement, imagining the finished space. But then, a not-so-fun thought pops into your head: “What on earth am I going to do with all this… stuff?” The old cabinets, the dated appliances, the mountain of packaging, and the dust… so much dust. A renovation project is like a major surgery for your home. It’s transformative and necessary, but the process itself can be messy and overwhelming. Just like a skilled surgeon has a plan for every step of an operation, you need a clear plan for managing the mess. Without one, your dream project can quickly turn into a nightmare of clutter and chaos. But don’t worry, you don’t have to go it alone. Think of this guide as your head nurse, walking you through the entire cleanout procedure from the first incision to the final bandage.
This guide to managing junk and debris removal will break down your renovation into three distinct and manageable phases, ensuring you have a clean and safe space from start to finish.
Phase 1: The Pre-Demolition Purge – Packing Your Parachute
Before a pilot takes off, they run through a meticulous pre-flight checklist. They don’t just jump in the cockpit and hope for the best. Your renovation is your flight, and the pre-demolition purge is your essential checklist. This phase is all about creating a clean slate and making the actual demolition work faster, easier, and safer for your contractors. It’s about packing your parachute so you can enjoy the ride.
Start with your cabinets. Empty them completely. This is your golden opportunity to be ruthless. That mismatched set of glasses from the 90s? The appliance manual for a blender you replaced years ago? This is the time to let it go. Create three simple piles: Keep, Donate/Sell, and Junk. Be honest with yourself. If you haven’t used it in a year, you probably never will. For old fixtures, appliances, and cabinets that are still in decent shape, consider selling them online or donating them to a local building material reuse store, like a Habitat for Humanity ReStore. Not only does this keep usable items out of the landfill, but it can also put a little cash back in your pocket. The items that are broken, outdated, or truly worthless belong in the “Junk” pile. This proactive sorting is the most important step you can take to ensure a smooth start.
By meticulously sorting your belongings before the first hammer swings, you set a clear and organized tone for the entire project.
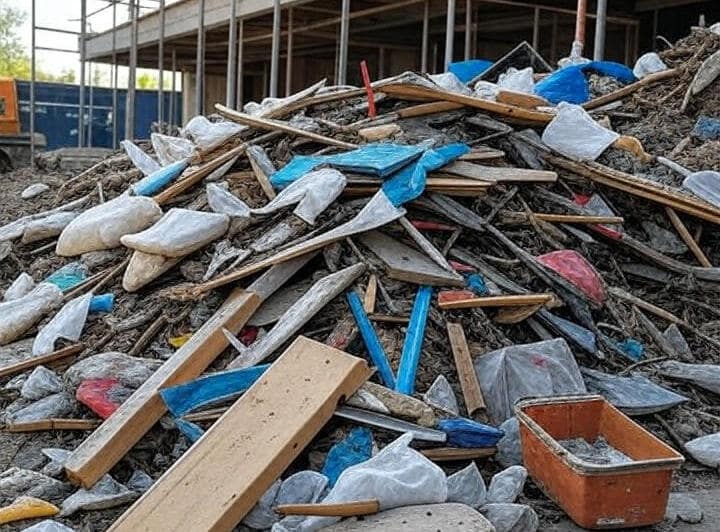
Phase 2: During the Renovation – Building Your Debris Dam
The walls are coming down, the old flooring is being ripped up, and the project is in full swing. This is where the mess is generated at an alarming rate and a guide to managing junk and debris removal can be helpful. Your goal during this phase is not to prevent the mess—that’s impossible—but to manage it. You need to build a dam to control the flood of debris, keeping the rest of your home livable and the worksite safe for everyone. An unmanaged worksite is a dangerous one, with tripping hazards and airborne dust posing real risks.
You have a few main options for your “debris dam.” Renting a large roll-off dumpster is like having a massive reservoir right in your driveway. It’s excellent for huge projects where you know you’ll generate a vast amount of waste all at once. The downside is that it takes up significant space and you pay for it to sit there for the entire rental period. A smaller, more agile option is a bagster-type system, which is like a heavy-duty bag you fill yourself. It’s more flexible and cost-effective for medium-sized projects, but you have to schedule a separate pickup once it’s full. The third, and often most efficient option, is scheduling multiple trips from a professional junk removal service. This is like having a dedicated cleanup crew on call. They come when you need them, haul away a specific load of debris, and leave you with a clean space to continue working. They handle the heavy lifting and proper disposal, which is a huge relief.
Choosing the right debris management system is crucial for maintaining order and safety, which naturally leads to the final stretch of your project.
Phase 3: The Post-Project Cleanout – The Victory Lap
The contractors have packed up their tools. Your new kitchen is installed, shining, and beautiful. You’re almost there! But there’s one final hurdle between you and your dream space: the post-project cleanout. This isn’t your typical Saturday tidying-up. This is the deep clean, the final victory lap where you clear the remnants of construction to fully reveal your stunning new room. It’s the equivalent of removing the scaffolding from a newly restored building to finally see its true glory.
This phase involves two types of cleanout. First, there’s the general mess: the protective plastic sheeting, the empty boxes for your new appliances, the leftover packaging materials, and a fine layer of construction dust that gets absolutely everywhere. A thorough vacuuming and wiping down of every surface is non-negotiable. The second, more complex part, involves dealing with any leftover construction-specific materials. This is where disposal gets tricky. You can’t just throw everything in your regular trash. Items like old drywall, concrete chunks, used paint cans, and treated wood often have specific disposal regulations to protect the environment. A professional junk removal service knows these rules inside and out. They can efficiently separate this specialized waste and ensure it is disposed of or recycled according to local laws, giving you complete peace of mind.
Successfully navigating this final cleanup phase means you can finally stop managing mess and start enjoying your brand-new space.
A renovation is a huge undertaking, but managing the junk and debris doesn’t have to be the hardest part. By following this blueprint—planning your purge, managing the mess during construction, and executing a final deep clean—you transform a chaotic process into a smooth, manageable journey. You’ve done the planning and the hard work; you deserve a junk removal partner to handle the heavy lifting.
For homeowners in Winter Haven, Lake Wales, Sebring, and the surrounding Heartland areas, that trusted partner is Junk-It Near Me. We understand the unique flow of a renovation project and are here to support you through every phase. Whether you need a single truckload to clear out your pre-demolition purge, scheduled pickups for ongoing debris during the project, or a final, comprehensive cleanout of leftover materials and packaging, our professional and friendly team is ready to help. We handle the heavy, the dirty, and the hazardous, disposing of everything responsibly so you can focus on what matters most: enjoying your beautifully transformed home. Let us take the junk off your hands.